Cake dummies are great for creating cake displays and using for photo ops. The possibilities are endless to create beautiful master pieces and keep them around longer than real cake. But did you know?
Did you know, that cake dummies are made of Polystyrene, also known as Styrofoam, and although some are recyclable, they ARE NOT BIODEGRADABLE. That is right! If not disposed of properly, it can have a negative impact on the environment. (Remember the ban on plastic straws and grocery bags? Same Concept!)
Not only that, but after several uses, you can’t help but get nicks, dents, color stains, and overall damage during the decorating and cleaning process. Once they are too damaged to reuse, you simply throw them away (Well, actually many can be recycled) and buy news one.
Now, what if I showed you a way to reuse the cake dummy, without damaging it and can last you for months or even years to come?
Would you try it?
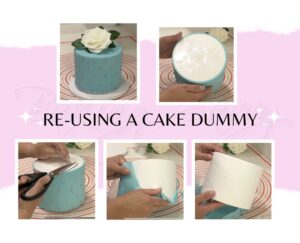
Well I am going to show you how I cover my dummy cakes to protect them from getting damaged after I am done using them.
Well, this technique will make it a whole lot easier to reuse your dummy cake
Dummy Cakes, or Faux cakes, as some call it can become pretty expensive. Sometimes, the cost of one dummy cake is the same as the cost of the ingredients or a cake recipe.
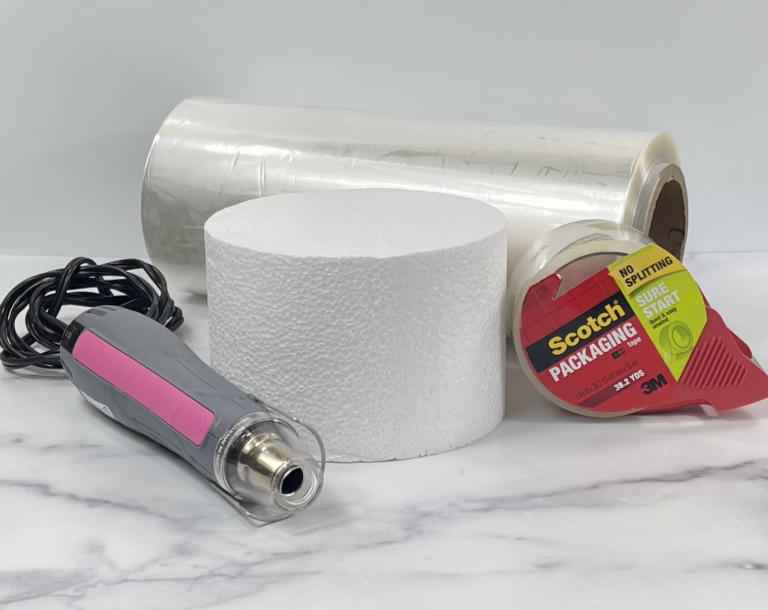
For this technique you will need:
- 12″ Bi-Fold Shrink Film —–> I Use This One
- Packaging Tape
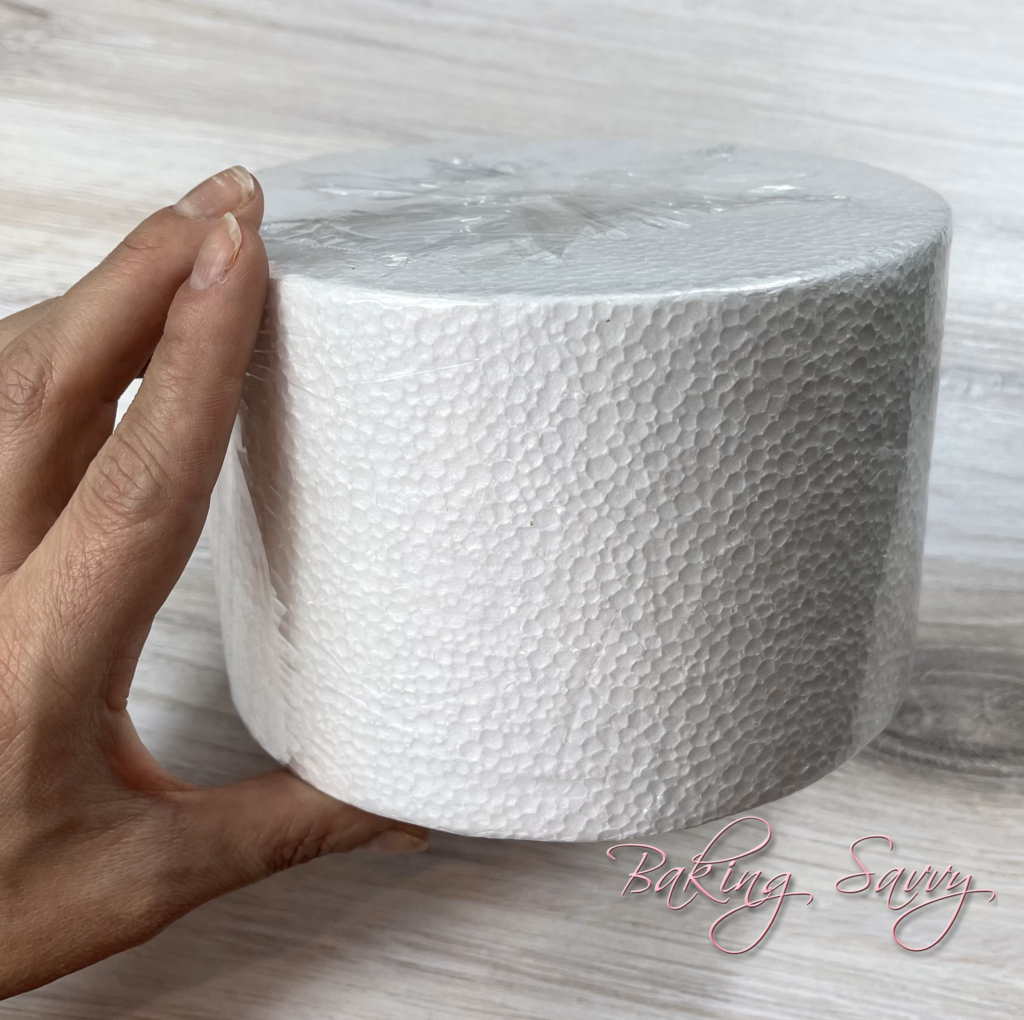
- Cake Dummy – I am using a 6″x5″ dummy in this tutorial
- Heating Tool —–> I Use This One
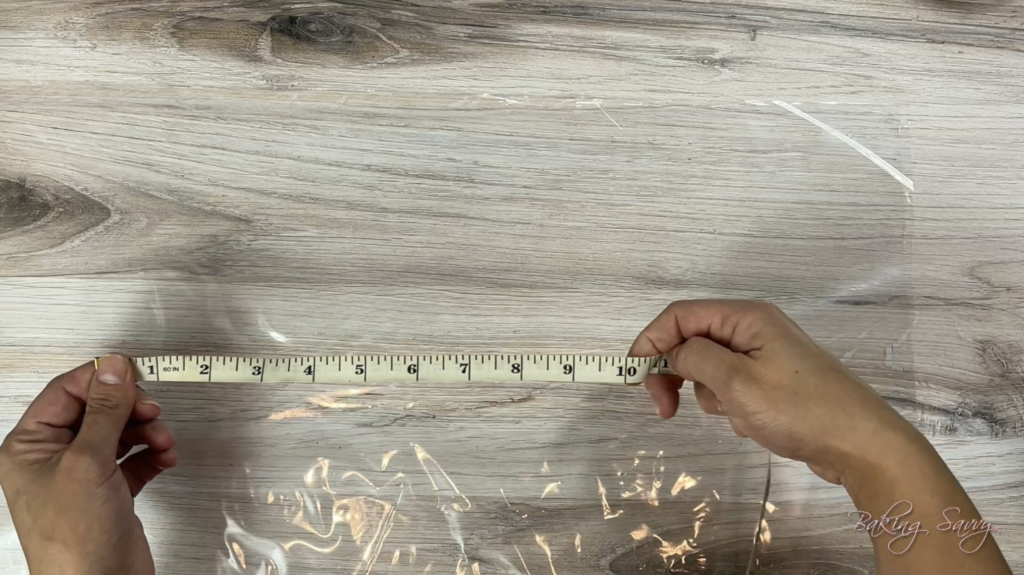
The first thing we need to do is determine how much shrink film you will need to cover the whole dummy. To find this out, you will need to find out the the circumference of the cake dummy.
Remember those good old days when we needed to learn formulas in Algebra class. (Yeah didn’t think how important that was back then, now you do!)
For the circumference, the formula is: 
In this tutorial I used a 6″ x 5″ round cake dummy. This meant the the circumference was approximately 18.84″. I then needed to calculate how much shrink film I needed length wise, to include the top and bottom portions of the cake dummy.
Now, my dummy is already 5″ in height. I need to have at least a 3″ overhang on the top and bottom portions of the cake dummy to completely cover it in shrink film. This would mean that my shrink film has to be 11″ in height to cover the whole cake dummy.
Because I am using a 12″ Bi-Fold shrink film,that means that when I open up my shrink film, it will measure approximately 24″ wide.
When I go to measure my circumference, I have to measure from the edge of the shrink film instead of on the fold. Why? Because I only need 18.84″ of shrink film to cover the circumference of the cake dummy and the bi-fold gives me 24″ already.
So the next thing I need to do is measure the coverage area I need for the whole dummy itself. For this, I will measure 11″ into the roll itself. After cutting the shrink film, I open it up and I should have a 11″ by 24″ sheet. Because the sheet is 24″ long and I only need 18.84″, I round it to 19″ and cut the extra shrink film.
If math is not your strong hold, let me help you out. I created a table with measurements for what your shrink film should measure based on the height and diameter of your cake dummy. (You’re Welcome! – in my Maui voice, hahaha)
| Coverage Chart Based on Cake Diameter and Heights | |||
|---|---|---|---|
| Cake Diameter | 4" Height | 5" Height | 6" Height |
| 6" | 10" x 18.84" | 11" x 18.84" | 12" x 18.84" |
| 8" | 12" x 25.12" | 13" x 25.12" | 14" x 25.12" |
| 10" | 14" x 31.40" | 15" x 31.40" | 16" x 31.40" |
| 12" | 16" x 37.68" | 17" x 37.68" | 18" x 37.68" |
(I would round up to the next number to keep things more simple)
Once I place the dummy in the middle of the shrink film, I wrap it around and cover the cake dummy. Now if my calculations are correct, I should have 3″ overlapping the top, 5″ covering the body of the dummy, and 3″ overlapping the bottom.. This is the 11″ I measured from the edge of the roll in toward the roll and not from the fold.
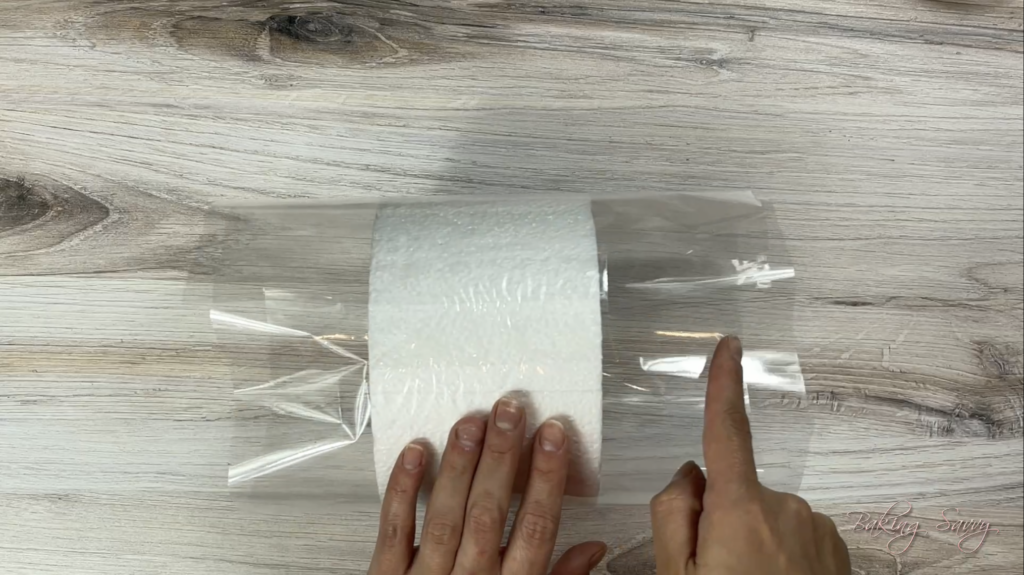
I secure the top and bottom ends, pulling up tight over the edges, and then securing with packaging tape. Once both ends are sealed, I then take my embossing heating tool and with the heat setting on low, I begin to shrink the film around the dummy.
PRO-TIP: Make sure to keep a good distance of about 1.5″ – 2″ away from the dummy when you are heating it. You do not want to over heat once section and cause the shrink film to tear.
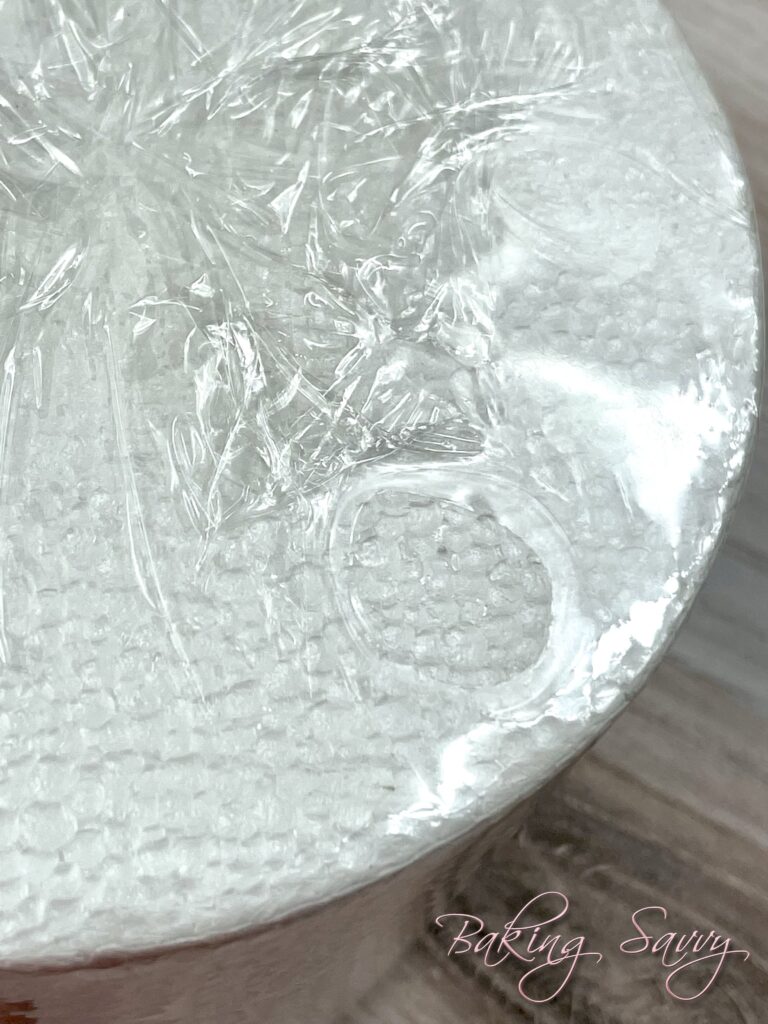
Once you have completely shrink wrapped your cake dummy, you are ready to decorate as you would any other cake. When you are ready to re-use it for another project, simply turn the dummy upside down and unwrap the ends of the shrink film, remove it, and that is it! You can now reuse your cake dummy for other projects.